Body
To add an HP Printer to MacOS:
- Open a browser and go to https://ftp.hp.com/pub/softlib/software12/HP_Quick_Start/osx/Applications/HP_Easy_Admin.app.zip | This will initiate a download
- Unzip the file, and open the application that was within:

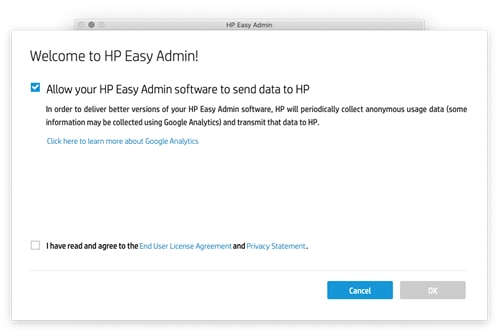
- Agree to the Terms and Conditions
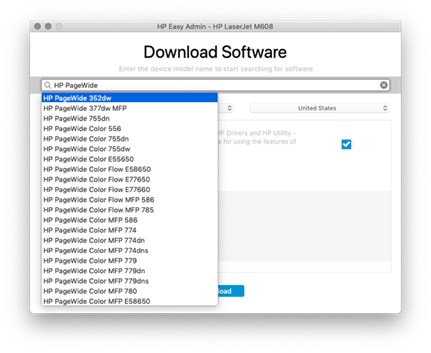
- Search for the printer that matches the printer that the user is trying to print to:
- Choose only the "Essential Software" Package, then click Download.

- Go to the downloads folder, and run the package that was downloaded there:
 This will install the driver to the Mac.
- Now go to the printer and get the IP Address (usually inside of settings under Ethernet). You can also open a terminal window and ping the hostname of the printer to get the IP address
- Open System Settings, and navigate to "Printers & Scanners"


- Click "Add Printer, Scanner, or Fax.."

- In the next dialogue box, navigate to the "IP Tab" and follow the next steps:
- Address: IP Address of the target printer.
- Protocol "Line Printer Daemon - LPD" or "HP Direct Jet - Socket" -- both appear to work.
- Name: Leave as-is, or, put in a name that is helpful to the end user.
- Use: Click Drop Down > "Select Software..." > In Next Dialogue Box, filter the model of printer and select from list > Click OK
- Click Add in "Add Printer Dialogue Box" (Should now be blue)
- The printer should be added, however make sure that it prints properly and that the features that are supposed to be there are actually there.